
Installing in Microsoft 365
This guide is for Microsoft 365 administrators. You'll deploy the Aimable Excel add-in to your organization from the admin center using your tenant's manifest link — a one-time rollout that makes the Aimable button appear in Excel for everyone you assign it to. No per-user installation is required.
Before you start
-
Admin access — you need an account that can deploy Integrated apps (a Global Administrator, or an admin role that permits add-in deployment).
-
Your manifest link — every Aimable tenant serves its add-in manifest at:
https://<customer>.aimable.ai/office/office/manifest.xmlReplace
<customer>with your Aimable subdomain.
Note: The manifest link must be reachable over HTTPS from the admin center. If validation fails, open the URL in a browser first to confirm it returns the XML.
1. Open Integrated apps
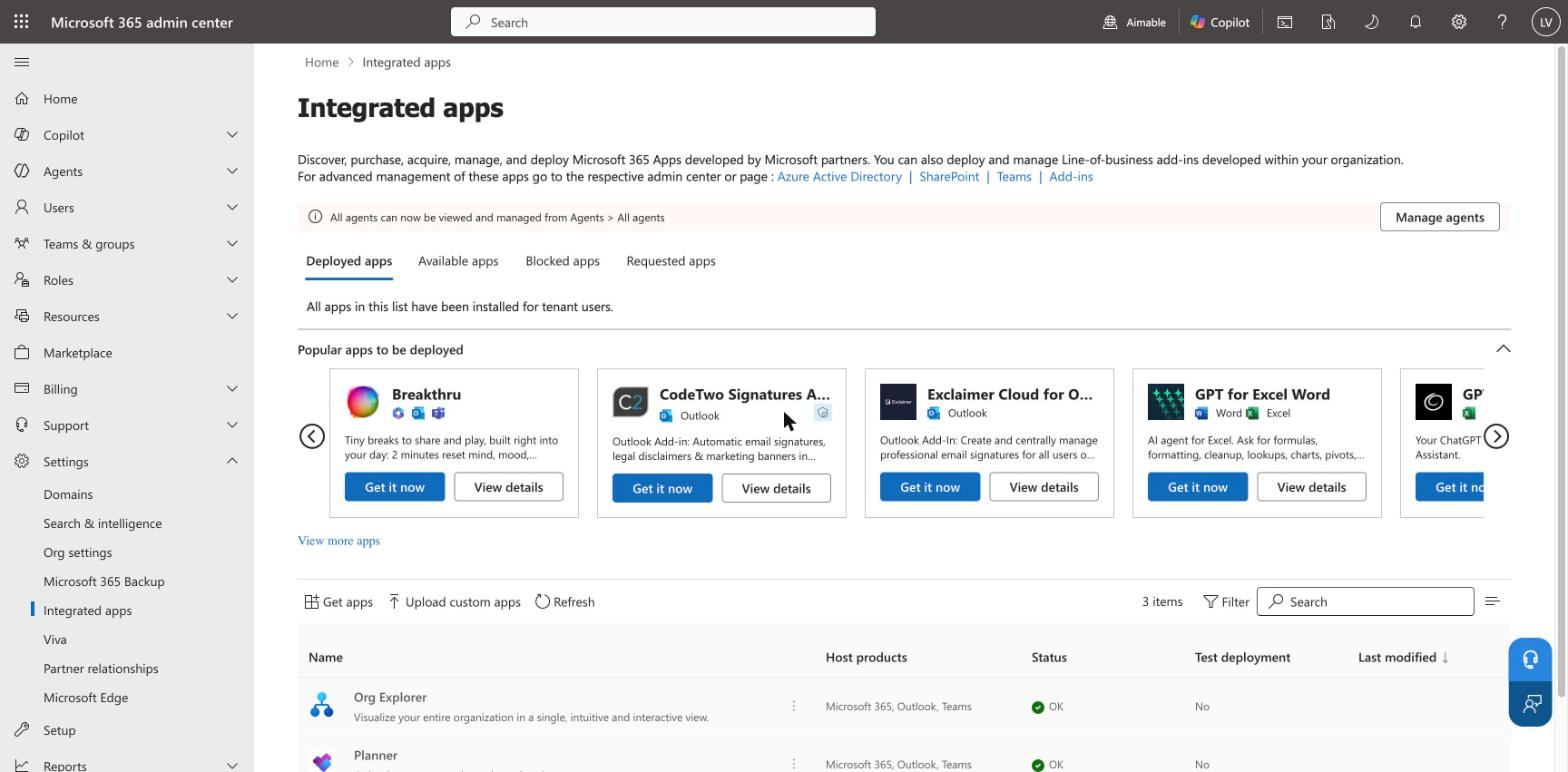
In the Microsoft 365 admin center, go to Settings → Integrated apps, then select Upload custom apps.
2. Choose the Office Add-in type
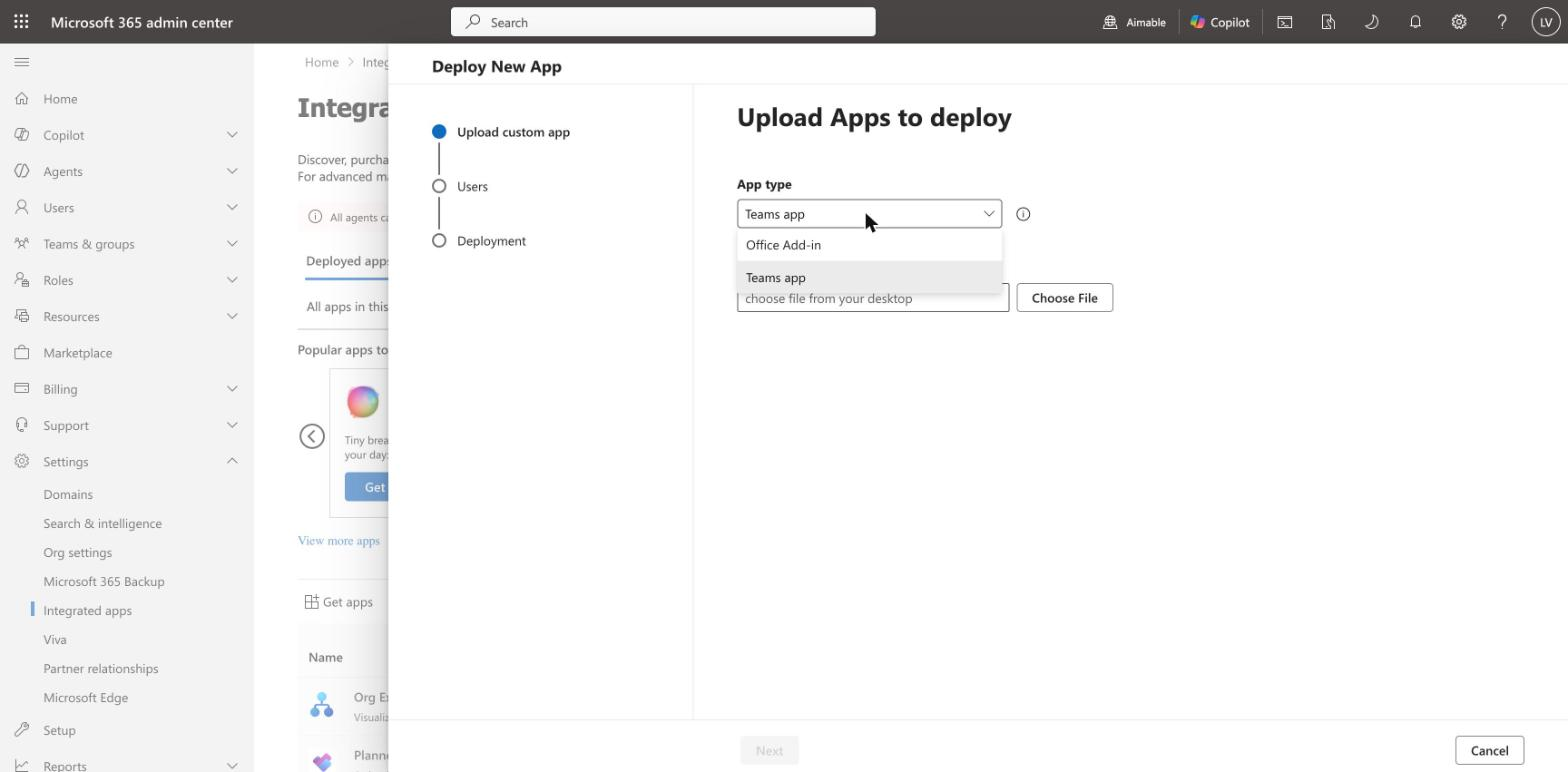
In the Deploy New App panel, set App type to Office Add-in.
3. Provide the manifest link
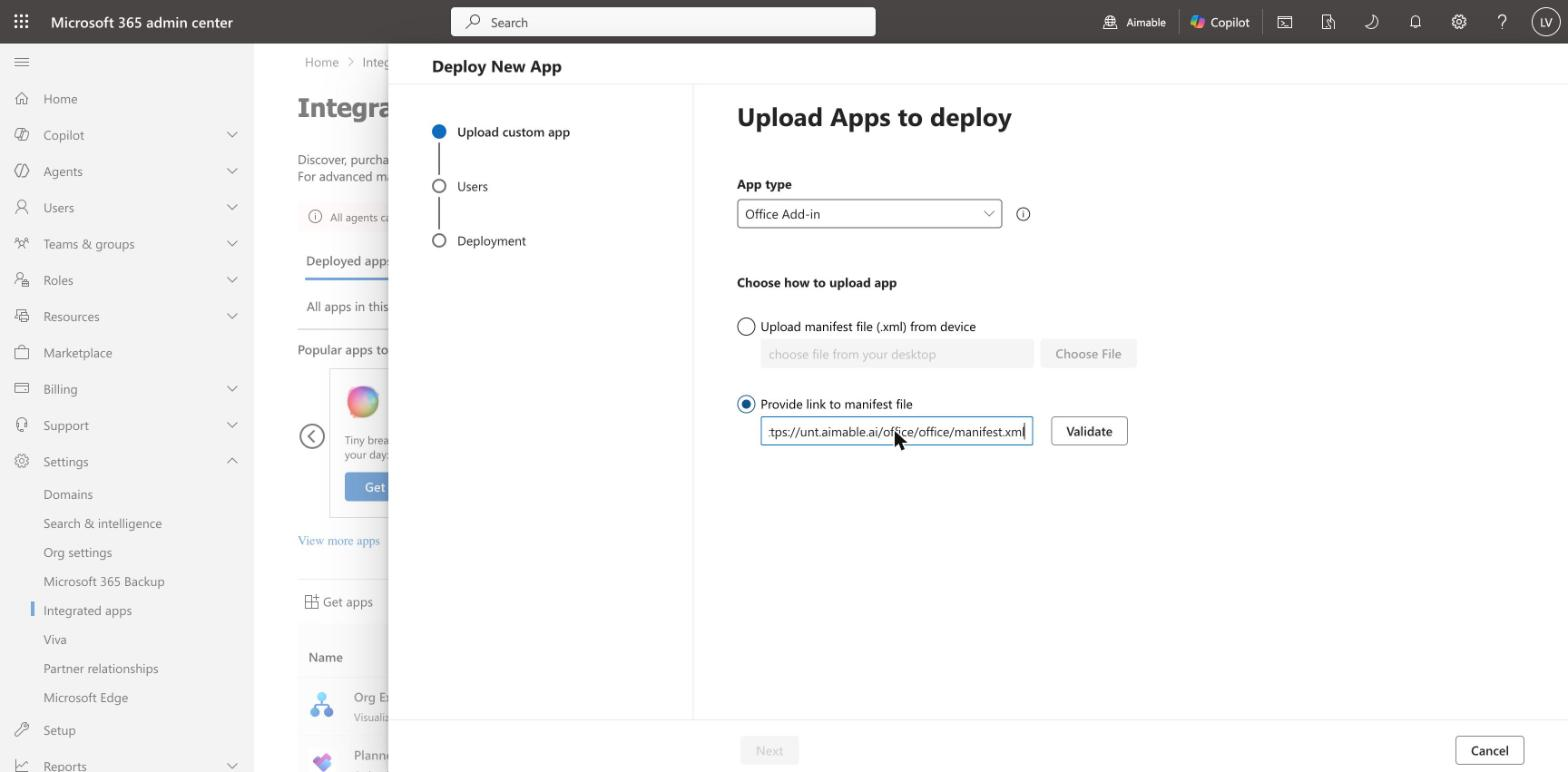
Choose Provide link to manifest file, paste your manifest URL, and select Validate.
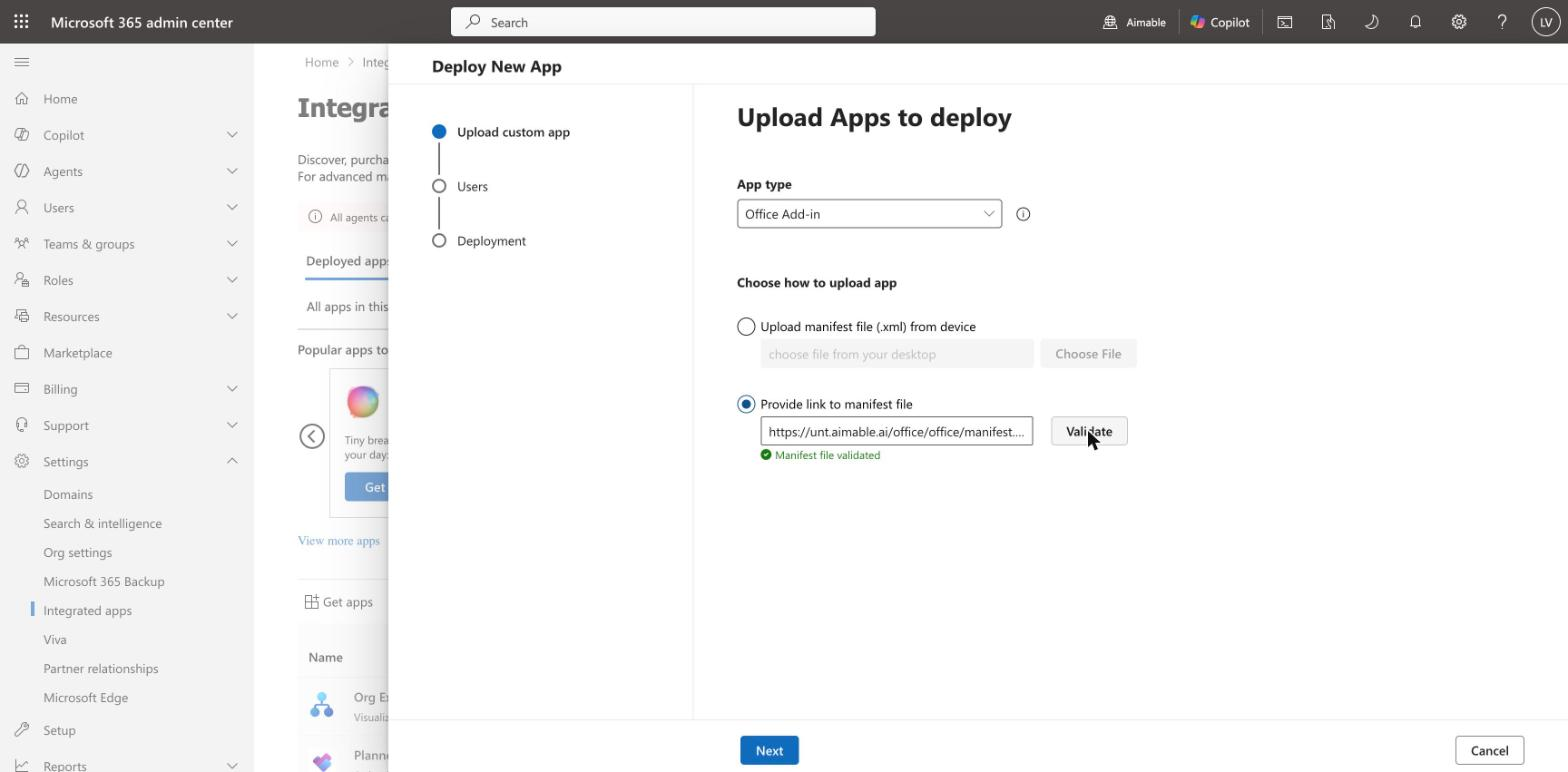
The admin center fetches the manifest and confirms it. You should see Manifest file validated, and Next becomes available.
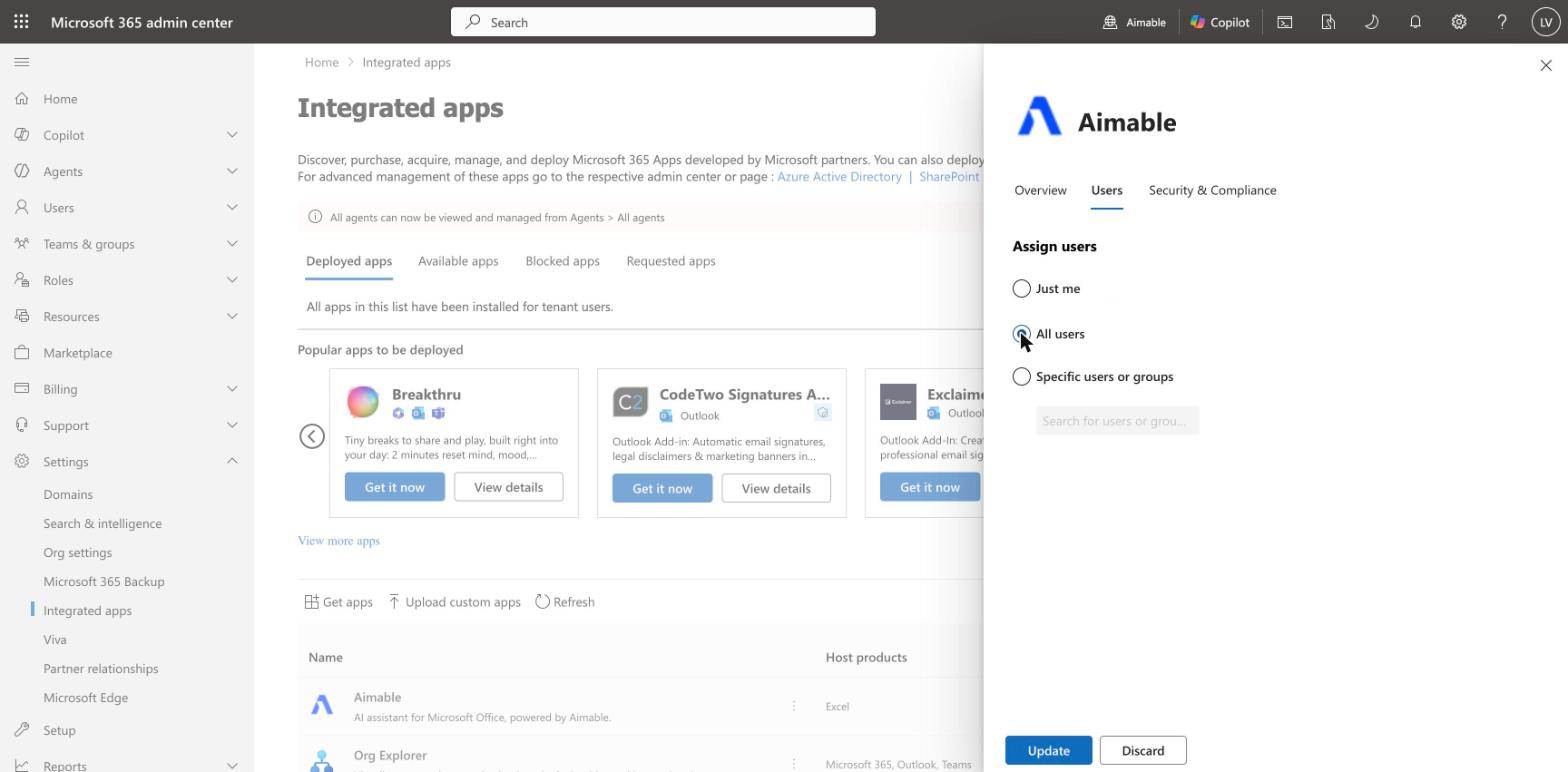
4. Assign users
Choose who gets the add-in:
- All users — deploy to everyone in the tenant (recommended for a general rollout).
- Specific users or groups — scope it to a pilot group or department by searching for the group.
- Just me — deploy only to your own account, useful for testing first.
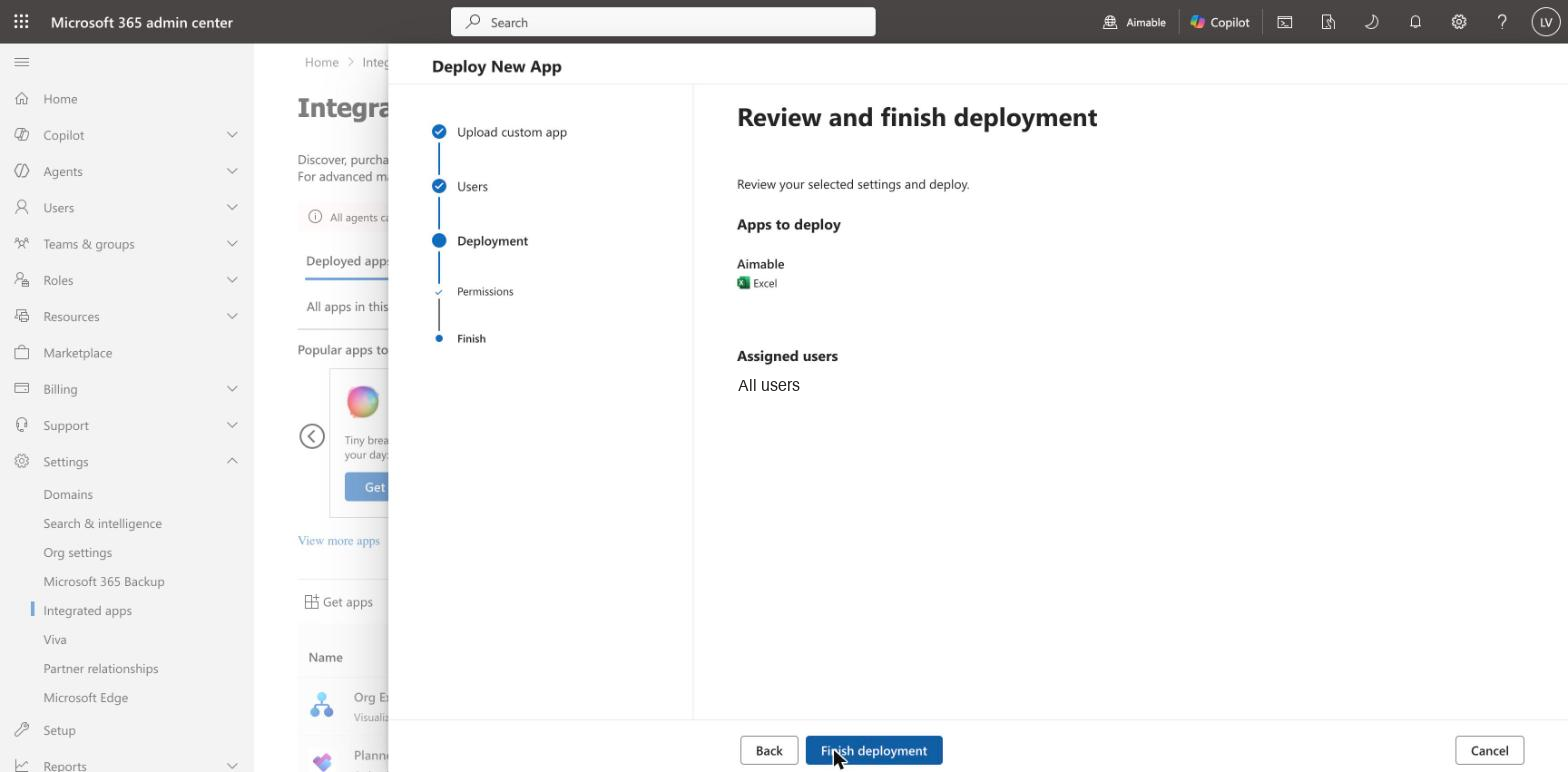
5. Review and finish deployment
Review your selected settings — the app, its host, and the assigned users — then select Finish deployment.
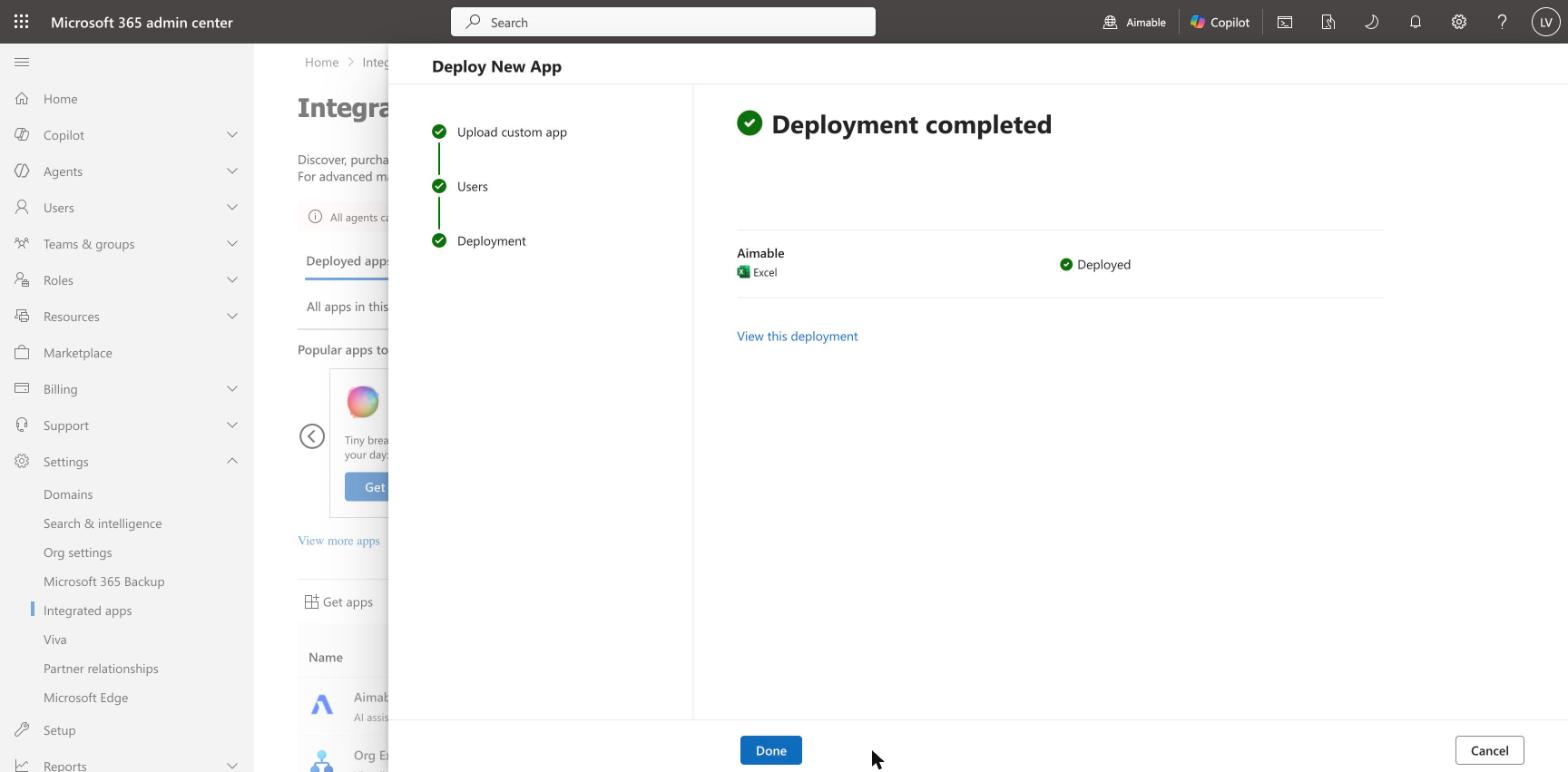
6. Deployment complete
When the deployment finishes, Aimable shows as Deployed for Excel.
What your users see
After deployment, the Aimable button appears on Excel's Home ribbon (in a group named Aimable). Selecting it opens the Aimable task pane, where users sign in to their workspace and start chatting — see Using it in Excel.
Note: Rollout isn't always instant. Microsoft can take up to 24 hours to surface a newly deployed add-in for all users, though it's often available within minutes. If the button doesn't appear yet, have users fully restart Excel.
Managing the add-in later
Everything after rollout lives under Settings → Integrated apps → Aimable:
- Edit users — change the audience (for example, expand from a pilot group to all users).
- Update add-in — pick up a new manifest version.
- Remove app — retire the add-in from your tenant.
Next steps
- Using it in Excel — what your users do once the add-in is live.
- Office Add-in overview — what the add-in is and what it can do.