
Using it in Excel
Once the add-in is deployed, anyone in scope can open Aimable straight from Excel and chat with it about the workbook they're in — it reads the sheet, and can create tables, write formulas, build charts, and more.
1. Open the assistant
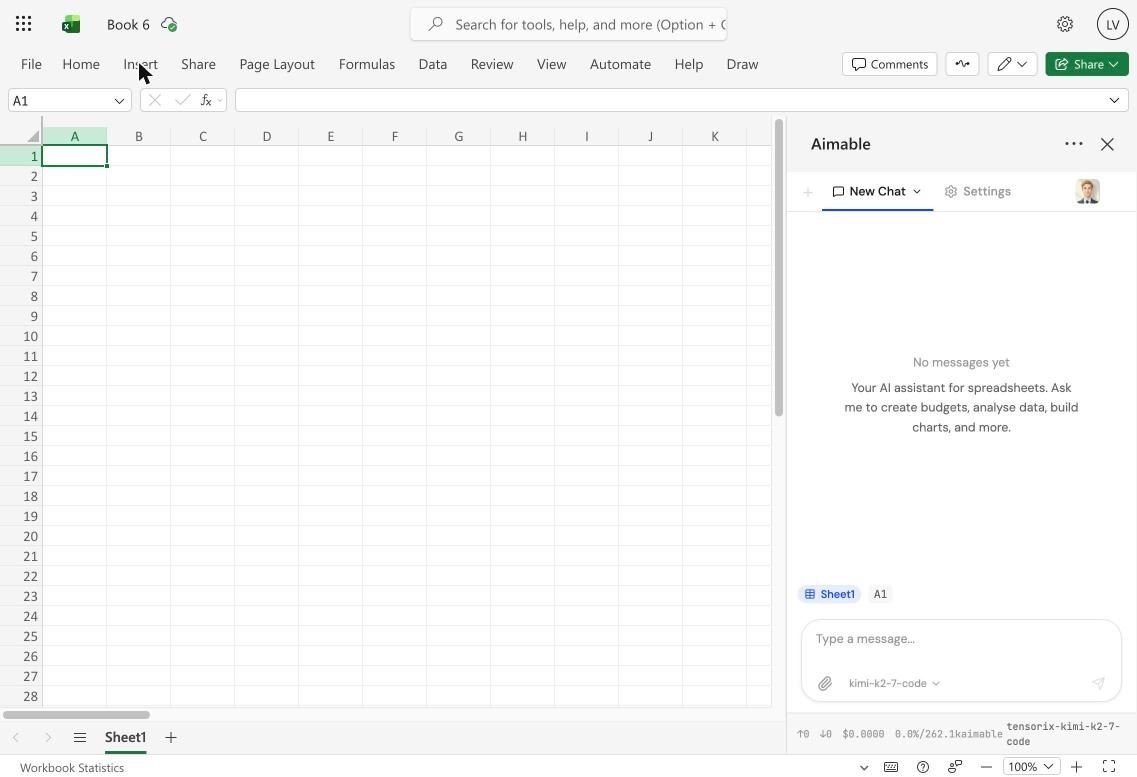
On the Home tab of the ribbon, select Aimable (far right). The Aimable task pane opens on the right side of the workbook.

The first time you open it, sign in to your Aimable workspace when prompted. Once signed in, the assistant is ready for a new chat.
2. Choose your space
Open Settings in the task pane and pick your workspace under Space. The selected space decides which model answers and which governance applies to the conversation.
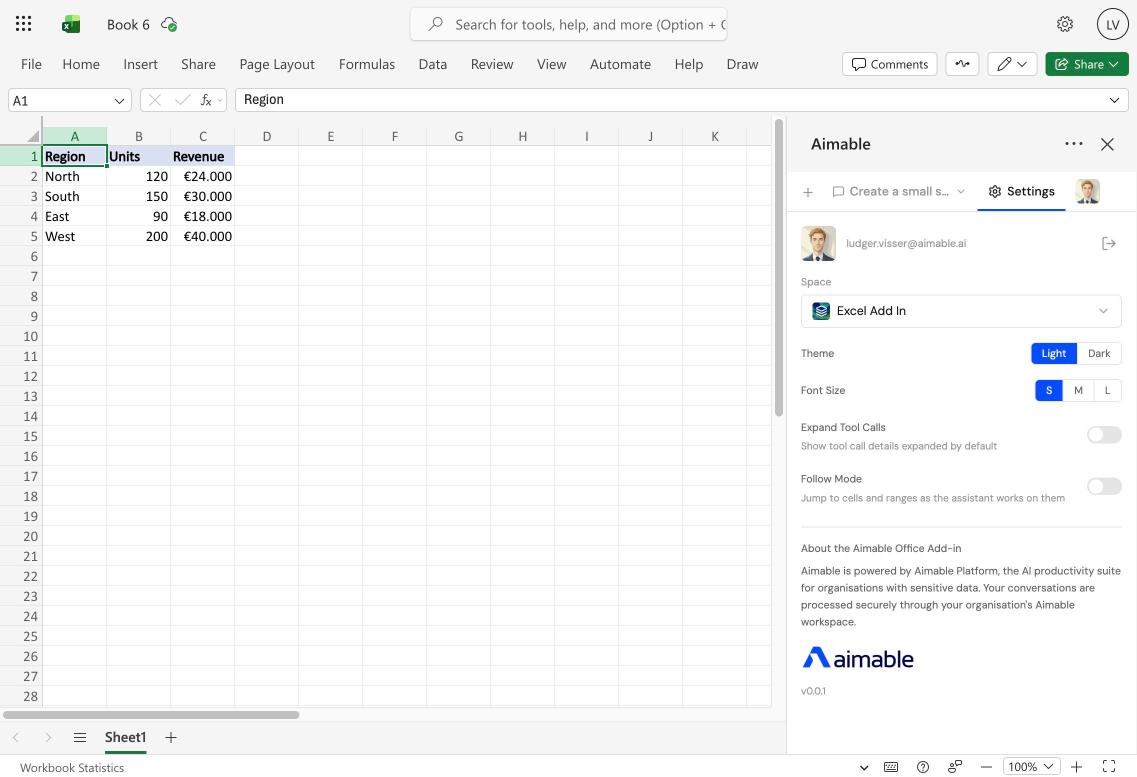
Use a dedicated space with a trusted model. PII protection is not yet fully supported in the Excel add-in, so route it through a model provider you trust rather than sending workbook data to an arbitrary one. In our experience, Kimi K2.7 Code from TensorX performs best for spreadsheet work. Set up a dedicated Excel Add-in space in the Aimable Console whose only allowed model is Kimi K2.7 Code, then select that space here. See Space model policy for how a space pins its model.
3. Work with your workbook
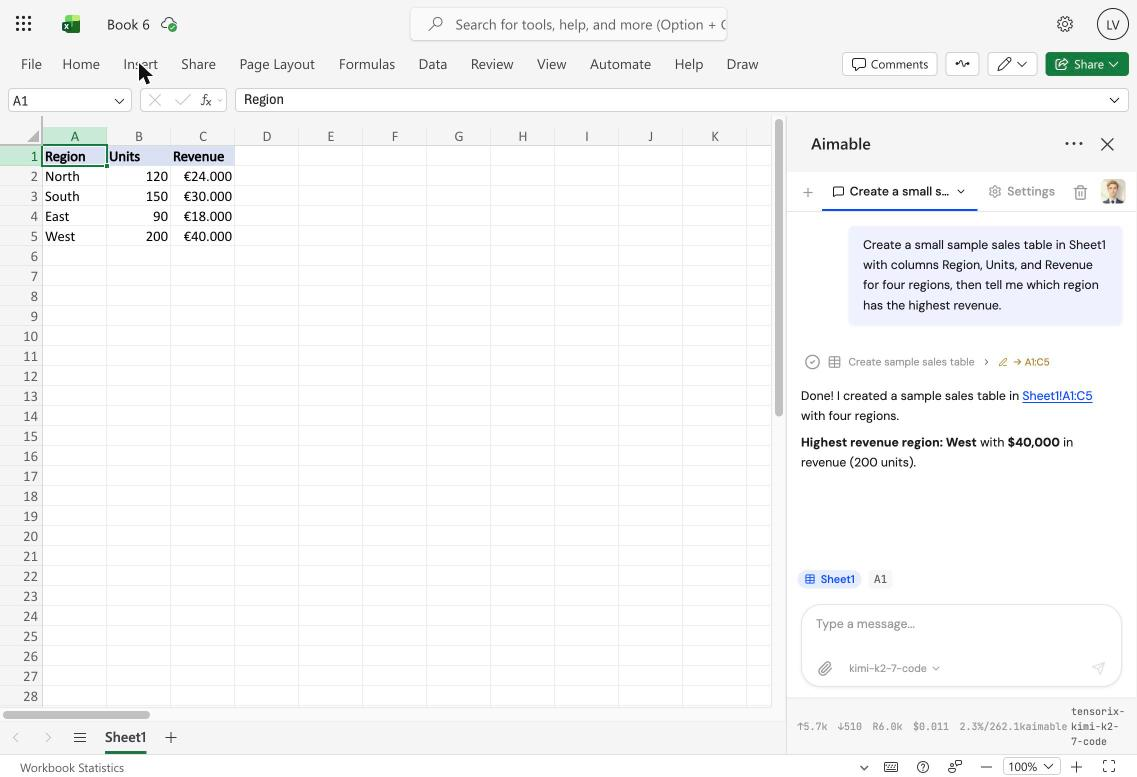
Type a request in the message box and send it. Aimable sees the sheet and cell you're on — shown as context chips like Sheet1 and A1 — and works directly in the workbook. For example, asking it to build a sample table and analyse it creates the data in the sheet and answers in the pane:
A few things worth knowing:
- Context chips under the conversation show exactly what Aimable can see — the active sheet and the selected range. Select a range before asking to scope it to that data.
- Follow Mode (in Settings) makes the pane jump to cells and ranges as the assistant works on them.
- Expand Tool Calls (in Settings) shows the detail of each action Aimable takes in the sheet.
- Start a clean conversation any time with New Chat.
Keep sensitive data in mind
The add-in's PII handling is still maturing, so keep that in mind when you're working with sensitive data — and use a space whose model comes from a provider you trust, as recommended above.
Next steps
- Installing in Microsoft 365 — deploy the add-in to your users.
- Office Add-in overview — what the add-in is and what it can do.